TRIBAL FACE PAINT DESIGN
This face paint design is a super cool and versatile design that can be used as a decoration, costume or accessory. The simplicity of this design is a significant aspect, as it is great for both beginners and professionals, and creates a complex looking design. This look draws on some aspects of Celtic designs, and generally these designs use only one colour, which adds to the simplicity of this face paint. Additionally, due to the nature of this design being popular for tattoos, this design can give people a chance to try out tattoos before getting them permanently.
YOU WILL NEED
Before starting your tribal face paint design, ensure you have all the necessary supplies.
A clean, well-lit workspace
A disposable surface to protect your workspace
A mirror for easy visibility
Smock or apron to protect your clothes
Disposable gloves for cleanliness
You're ready to begin when you’re sure you have all the necessary tools!
KNOW MORE
STEP ONE | SWIRL TECHNIQUE
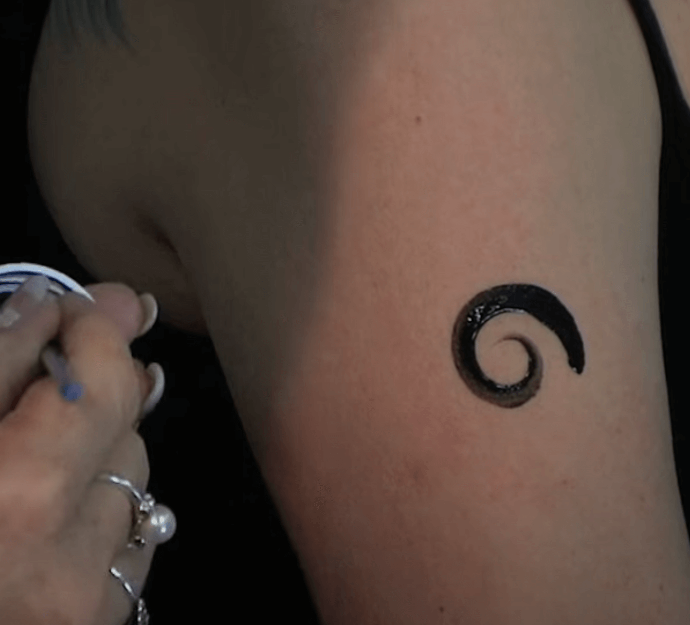
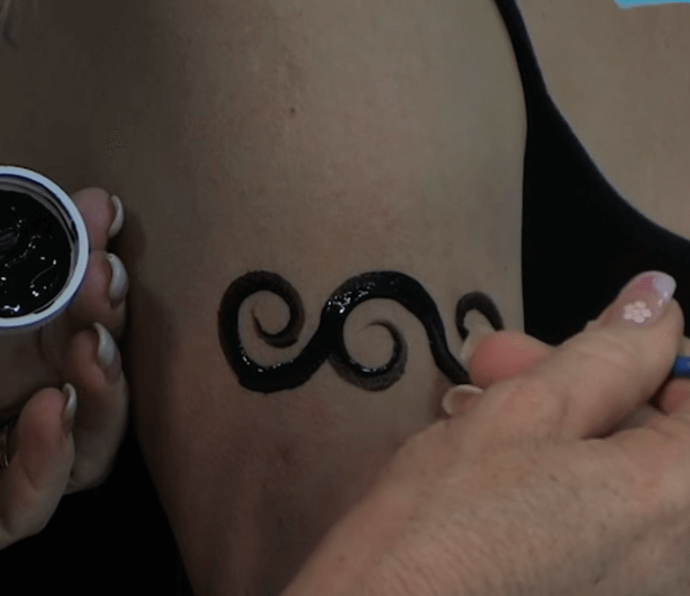
To begin this design, create a swirl in the desired spot for the centre of the design. Apply more pressure at the beginning of the stroke, and as you finish the swirl decrease the pressure, to create a dynamic shape. This varying pressure will create thinner lines at the centre, and add more interest and depth to the design.
STEP TWO | CONNECTING SWIRL
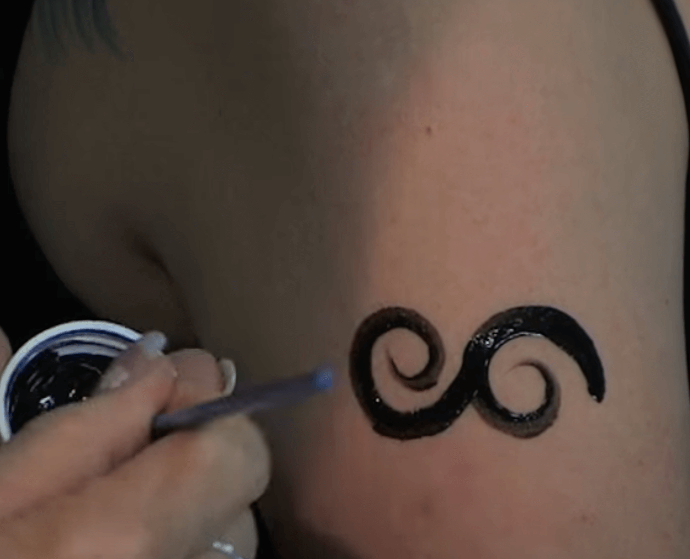
Repeat the swirl design, with the start of the second swirl extending from the first. Ensure that when the new swirls are added, they flow in the same direction as the swirls they extend from.
STEP THREE | EXTENDING THE DESIGN
Continue this swirl pattern horizontally, or on either side of the original swirl. If you are doing this design on the face, you can extend it up the side of the face or on the neck.
STEP FOUR | EXTRA DETAILS
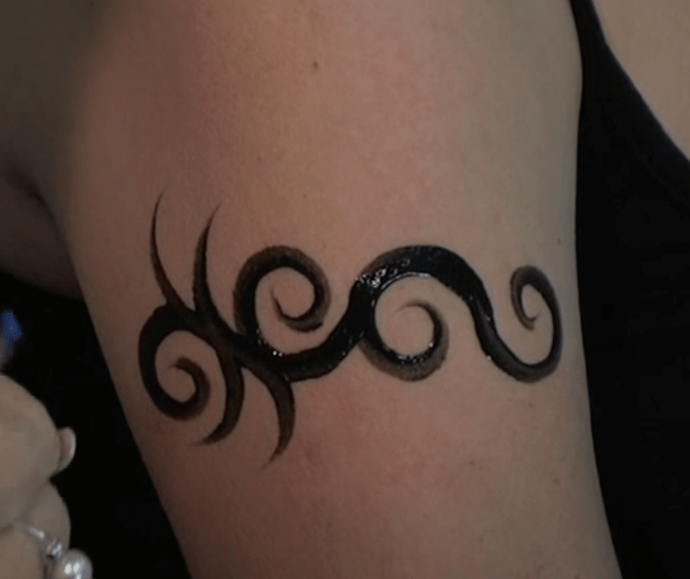
Now, you can use the same brush and paint to add short individual strokes from the swirls, and lift the brush throughout the strokes so achieve sharp points for these details.
STEP FIVE | FINISHING TOUCHES
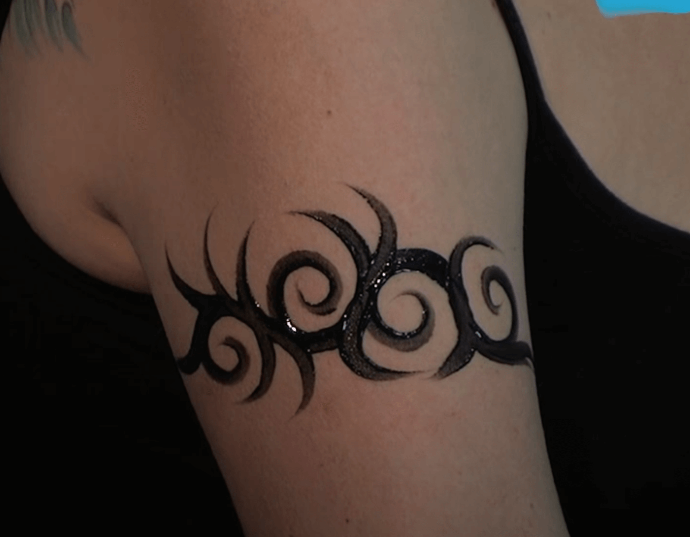
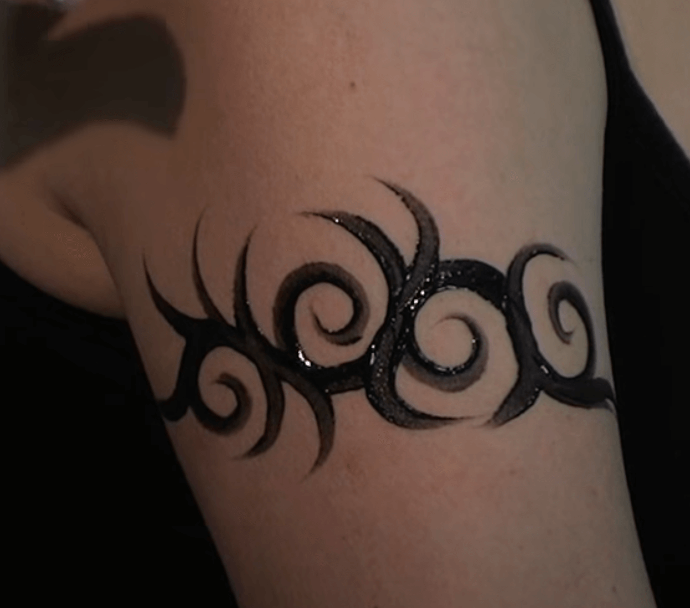
Continue to add these individual strokes to the design to add detail and extend it, and additionally, multiple strokes can be added next to each other, following the same curve, to achieve a really cool design like the one shown in this image.
Tips to make your next tribal face paint design even better
There are plenty of ways to improve your next tribal face paint design. For example, creating these swirling patterns in the shape of an object or pattern can create awesome designs.
Practice your tribal designs
As you can see, creating a tribal face paint design isn’t difficult, but it does take some practice. If you follow the tips and steps outlined in this guide, you’ll be a pro in no time. With a bit of practice, you’ll be able to easily create perfect tribal face paint designs.
