SANTA FACE PAINT DESIGN
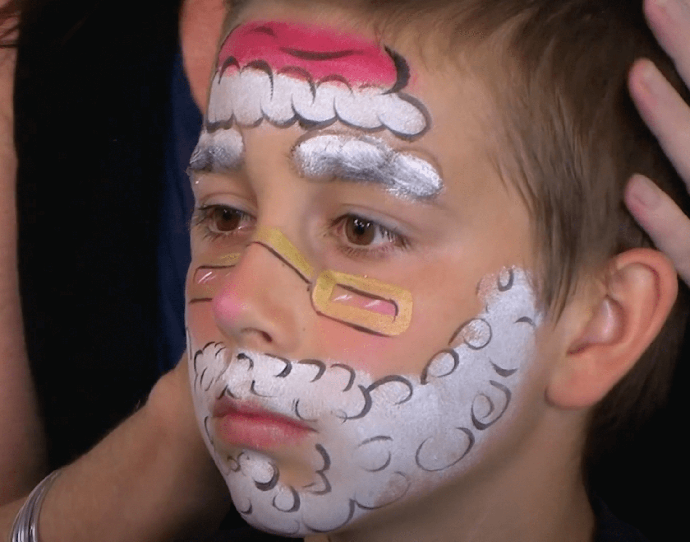
This design is perfect for Christmas time, or any dress up costume, and is a great choice for everyone, whether you've face painted before or not. This design can be a cute holiday costume for kids or a convenient choice for adults, and lucky for you, this guide will provide you with great tips and tricks to perfect this cool Santa look.
YOU WILL NEED
Before starting your butterfly face paint design, ensure you have all the necessary supplies.
A clean, well-lit workspace
A disposable surface to protect your workspace
A mirror for easy visibility
Smock or apron to protect your clothes
Disposable gloves for cleanliness
OR
You're ready to begin when you’re sure you have all the necessary tools!
STEP ONE | BASE COLOURS
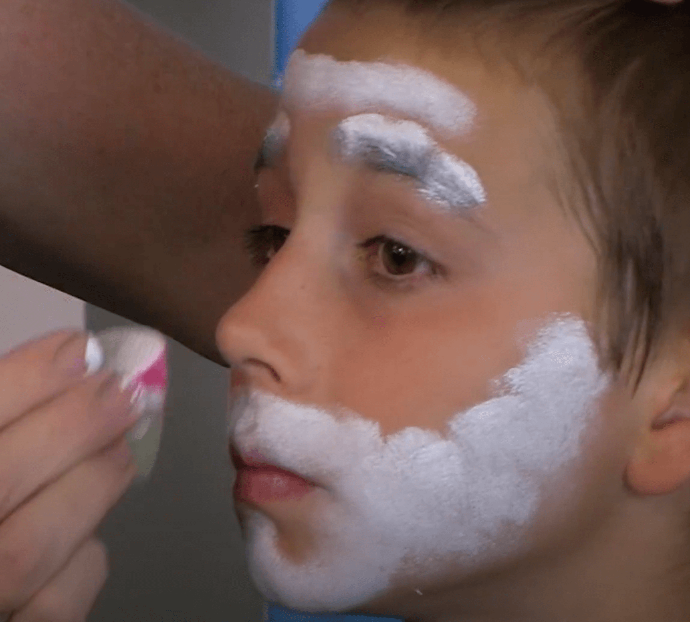
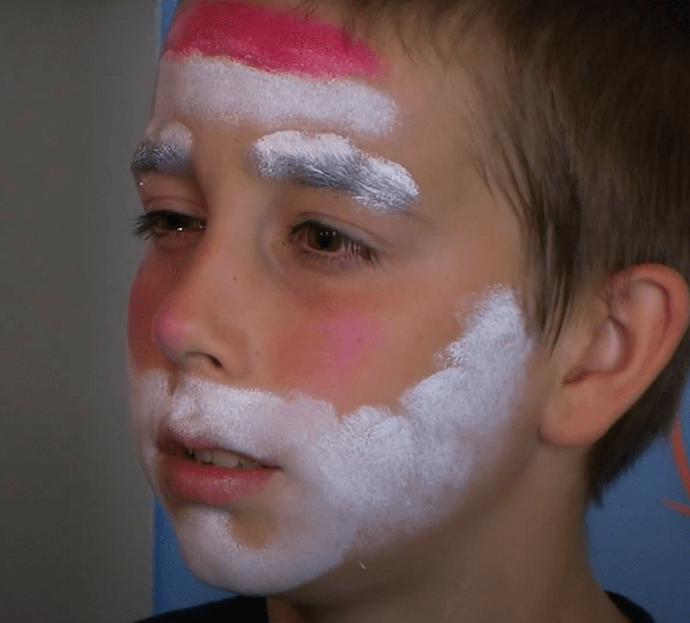
Begin by loading your sponge with white face paint and gently applying to the eyebrows, forehead, jawline, chin, upper lip and mouth area. Gently dab it on, and don't worry if the edges aren't smooth, as this will be the base for the beard and eyebrows and bumps will add to the design.
STEP TWO | BLUSH
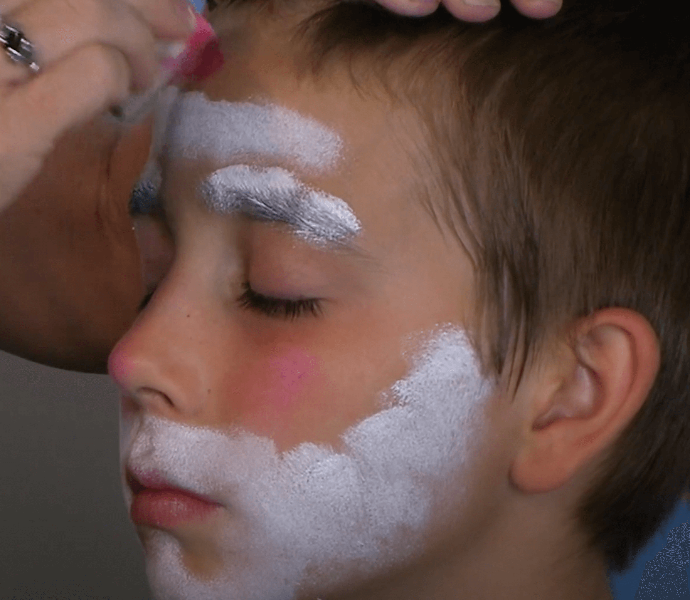
Using this sponge, add some more white and a little red to create a light pink, and gently dab this onto the nose and cheeks to create a light pink blush.
STEP THREE | HAT BASE
Using a sponge, apply red paint in a line above the white sponged line on the forehead, and this will become a festive hat.
STEP FOUR | GLASSES FRAME
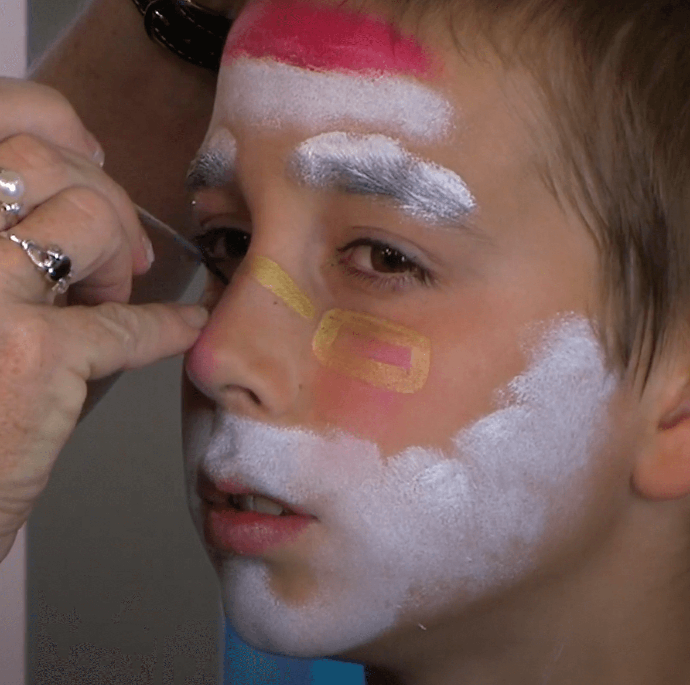
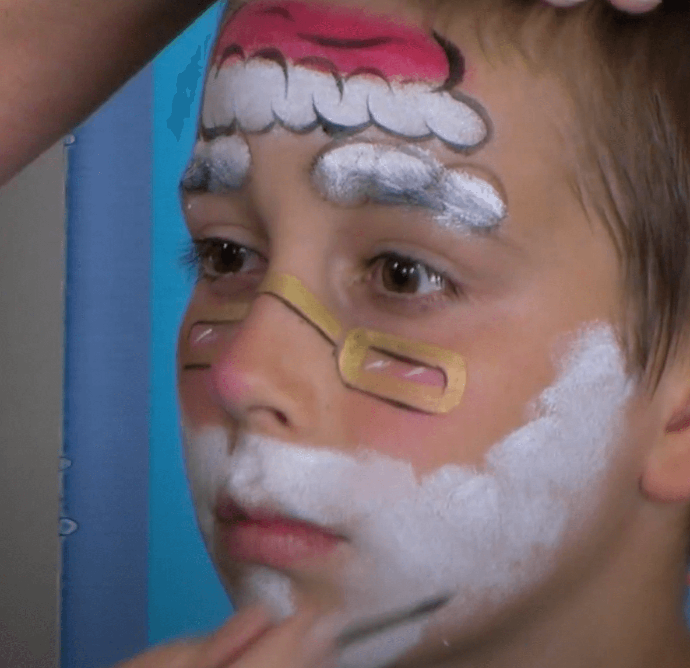
Using a round brush, create a metallic gold outline of glasses by painting small horizontal rectangles on both cheeks, and connect these two rectangles with a line across the bridge of the nose.
STEP FIVE | GLASSES SHADOW
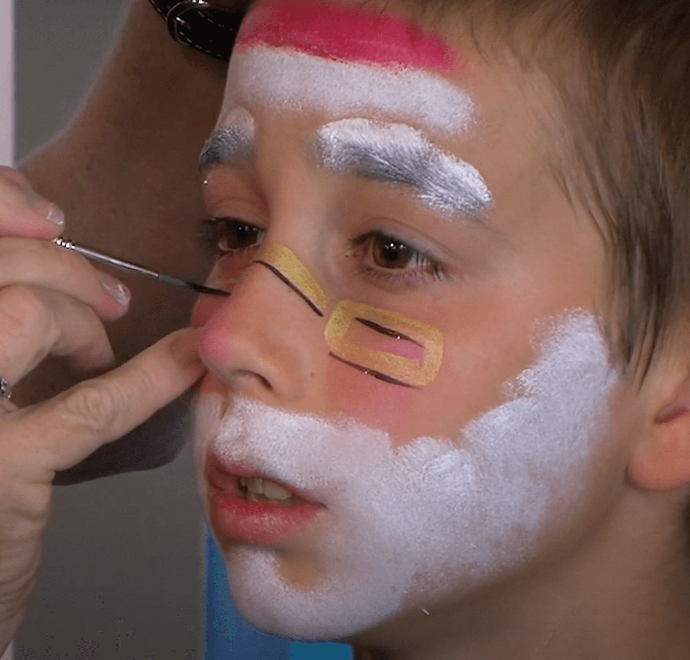
Using a script liner, add a thin black line to the bottom of each horizontal gold line, creating depth through the use of a shadow.
STEP SIX | REFLECTIVE DETAIL
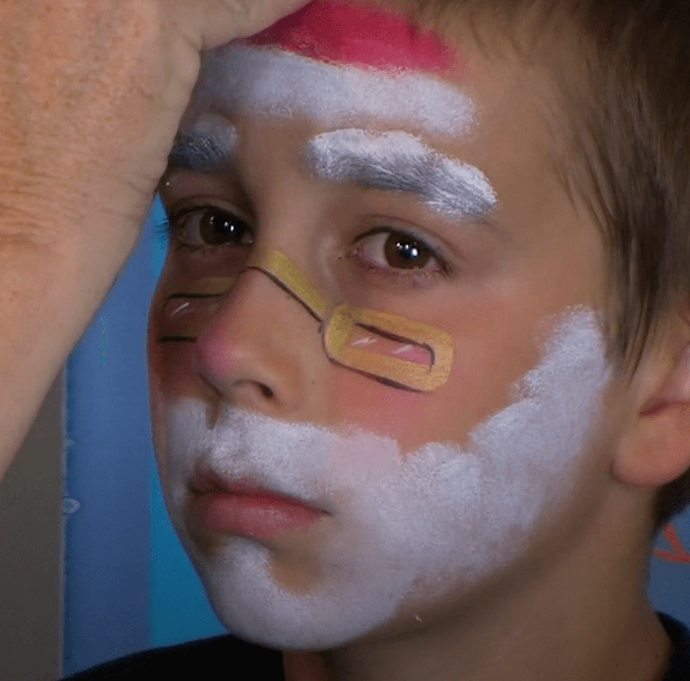
Using the script liner, paint slanted white lines within the rectangular frames of the glasses. This makes the glasses look reflective and adds a fun detail to the design.
STEP SEVEN | HAT AND EYEBROW OUTLINE
Using the script liner and black paint, outline the eyebrows and base colours on the forehead with short, curved lines to create a fluffy look for the hat and hair.
You may also want to add a few horizontal wavy lines across the red sponged line to create the effect of fabric.
STEP EIGHT | BEARD OUTLINE AND DETAIL
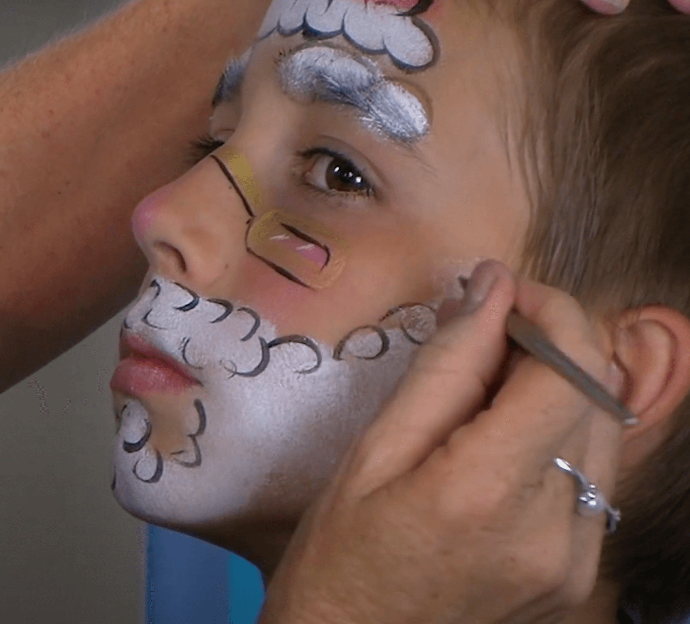
Repeat the process used for the hat and eyebrows on the edges of beard and around the mouth area, with a few curled brush strokes throughout the cheek area, as this gives the impression of a fluffy beard, just like Santa's!
Tips to make your next Santa face paint design even better
There are plenty of ways to improve your next Santa face paint design. For example, if you’re creating a Santa design for a child, you could make the glasses or blush more oversized to make it appear cuter.
Practice your Santa designs
As you can see, creating a Santa face paint design isn’t difficult, but it does take some practice. If you follow the tips and steps outlined in this guide, you’ll be a pro in no time. With a bit of practice, you’ll be able to easily create perfect Santa face paint designs.
