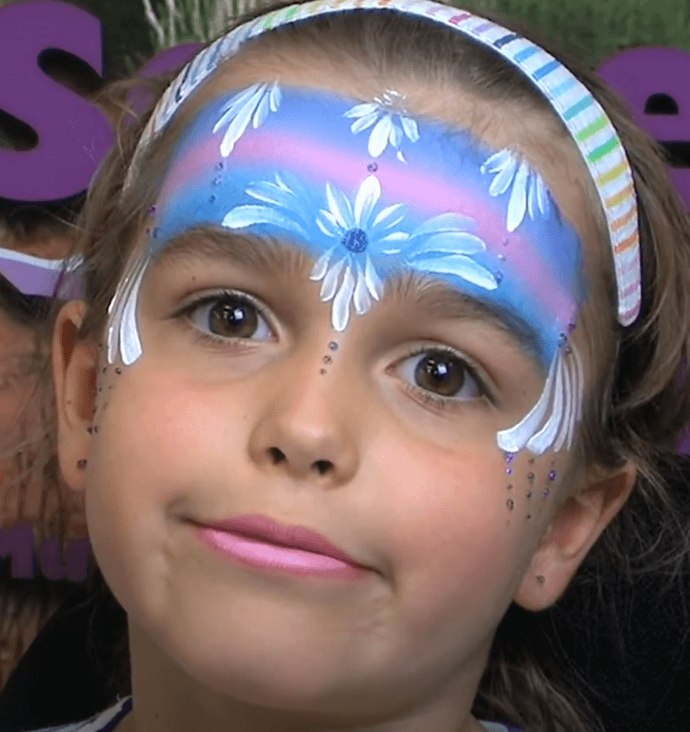
RAINBOW PRINCESS FACE PAINT DESIGN
This beautiful rainbow princess face paint design can be a unique and beautiful accessory to any look, or the centre piece of an awesome costume. This design may be complex looking, but thanks to this guide, you'll be able to perfect it in no time, and create stunning rainbow princess looks. Whether you're a face paint beginner or a professional looking for inspiration, this design can be a great way to have fun and create beautiful rainbow princesses and princes.
YOU WILL NEED
Before starting your princess face paint design, ensure you have all the necessary supplies.
A clean, well-lit workspace
A disposable surface to protect your workspace
A mirror for easy visibility
Smock or apron to protect your clothes
Disposable gloves for cleanliness
You're ready to begin when you’re sure you have all the necessary tools!
STEP ONE | PREPARE THE SPONGE
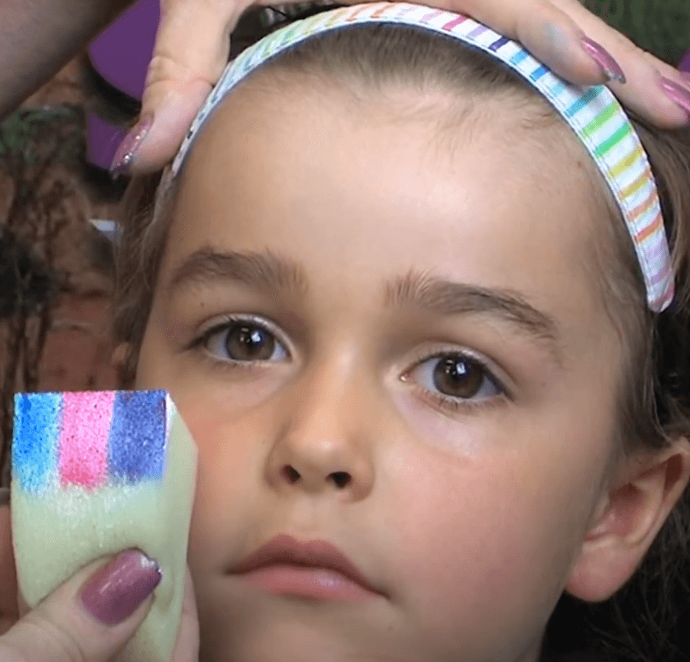
Prepare the sponge by firstly covering half of one of its surfaces with white paint, then over this paint a stripe of blue on one edge, a stripe of red in the middle and a stripe of purple on the other edge. This purple can be made by mixing the red and the blue paint.
STEP TWO | TIARA BASE
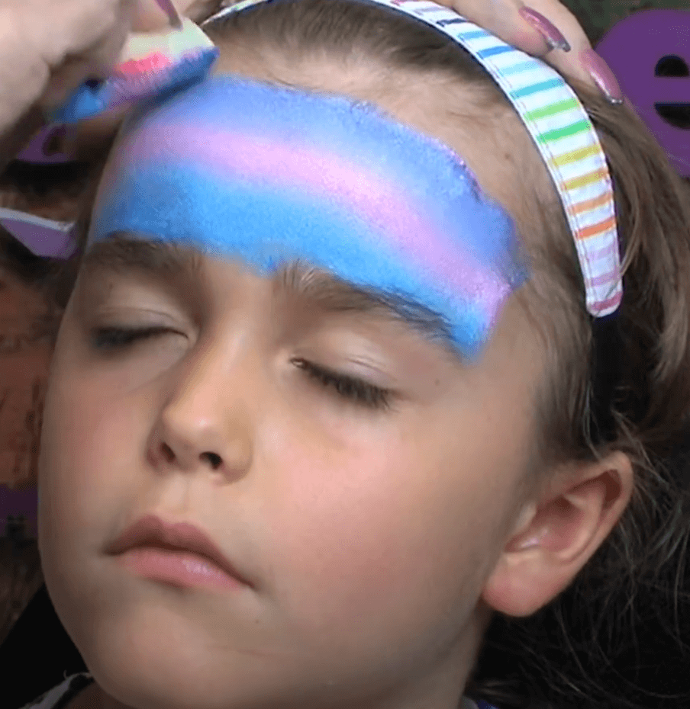
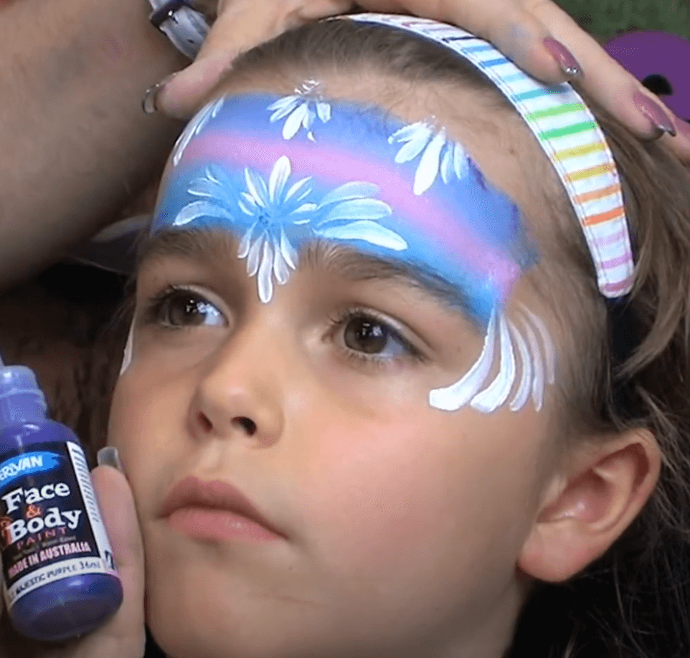
Use this sponge to create the tiara base by positioning it against the forehead with the blue at the bottom and the purple at the top, and move across the forehead while dabbing. This will create a gradient between the colours, and a beautiful base for the tiara.
STEP THREE | WHITE DETAILS
Using a chisel brush and white create comma-like strokes from the area around the outer corners of the eyes, towards the edge of the tiara base. To create these strokes, turn the brush to create thinner lines towards the end of the stroke.
Use a round brush with white paint to create similar lines, centring around the area between the eyebrows, and the upper edge of the tiara base.
STEP FOUR | KINDY GLITZ
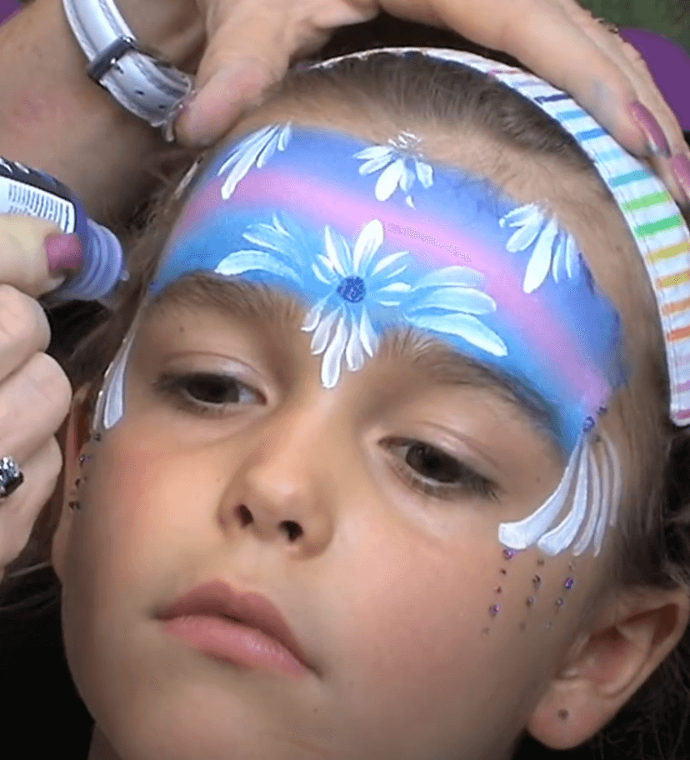
Using the purple Derivan kindy glitz, create central spots at the centre of each group of white strokes. At the edges of the design, a small group of 3 or 4 dots can be added instead of one central spot to add extra detail.
From the bottom of each of the comma-strokes at the edge of the face, dot a few spots of kindy glitz downwards.
STEP FIVE | LIPS
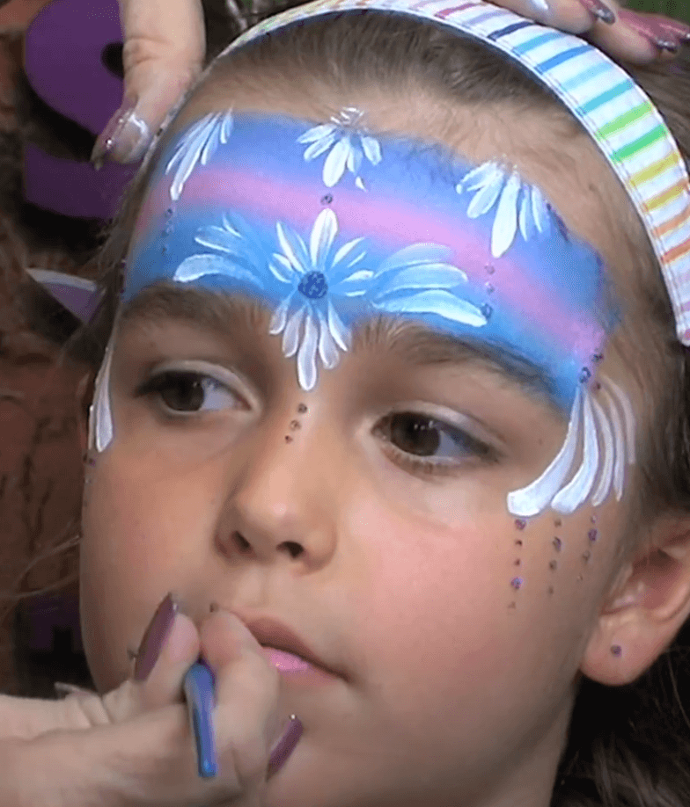
Mix the white and red paint together to create a lovely pink, and use the chisel brush to fill in the lips and create a beautiful lipstick look
Tips to make your next princess face paint design even better
There are plenty of ways to improve your next princess face paint design. For example, you can customise the tiara base colours to suit whoever you're making the design for.
Practice your princess designs
As you can see, creating a princess face paint design isn’t difficult, but it does take some practice. If you follow the tips and steps outlined in this guide, you’ll be a pro in no time. With a bit of practice, you’ll be able to easily create beautiful princess face paint designs.
