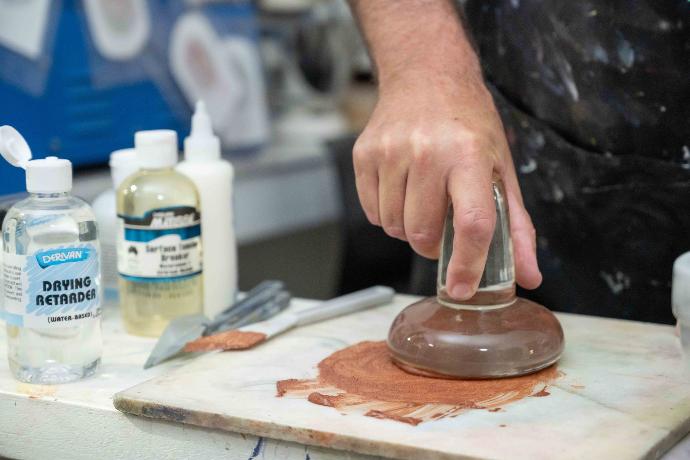
OVERVIEW OF HOW MANUFACTURERS MAKE PAINT
There are three main ingredients in paints - the pigment (or colouring), the binder (or the glue part), and the vehicle (the thing that makes the paint liquid rather than powder and facilitates the binder and pigments mixing and then being able to be applied to a surface)
Various other additives can be used to: help stop the paint from foaming or creating air trapped in the paint. Additives to stop or reduce separating or to help to matt the colour down and disperse the pigments, slow the drying time etc
Acrylics are a type of plastic (and is the binder/glue part). They are very small beads of plastic emulsified into water (the vehicle), and then in turn the pigments are dispersed into the acrylic emulsion.
Before the dry pigment can be added to the acrylic emulsion though, it will need to be ground or milled to ensure the correct particle size for each colour is reached - this grinding/milling will remove any large "lumps" or roughness to the pigment. However this process would have an adverse effect on the acrylic, so it is done before the pigment is dispersed in acrylic, this is done in either a ball mill or triple roll mill.
Once the pigment is adequately ground and dispersed into a slurry, it is added under high sheer to the acrylic. Other agents may be used, such as dispersants, surfactants, pH stabilisers, anti-foaming agents, matting agents, anti-settling agents etc.
Once the paint is mixed, a series of quality control tests are performed to ensure the colour meets the standards required by artists.
After testing, the paint is released to be filled. The paints may be filled into jars or tubes using a variety of machines; some of the smaller batches are hand filled as the runs are too short of making the use of automated filling machines worthwhile.
PAINT MAKING BY HAND STEP ONE
GRIND THE PIGMENT
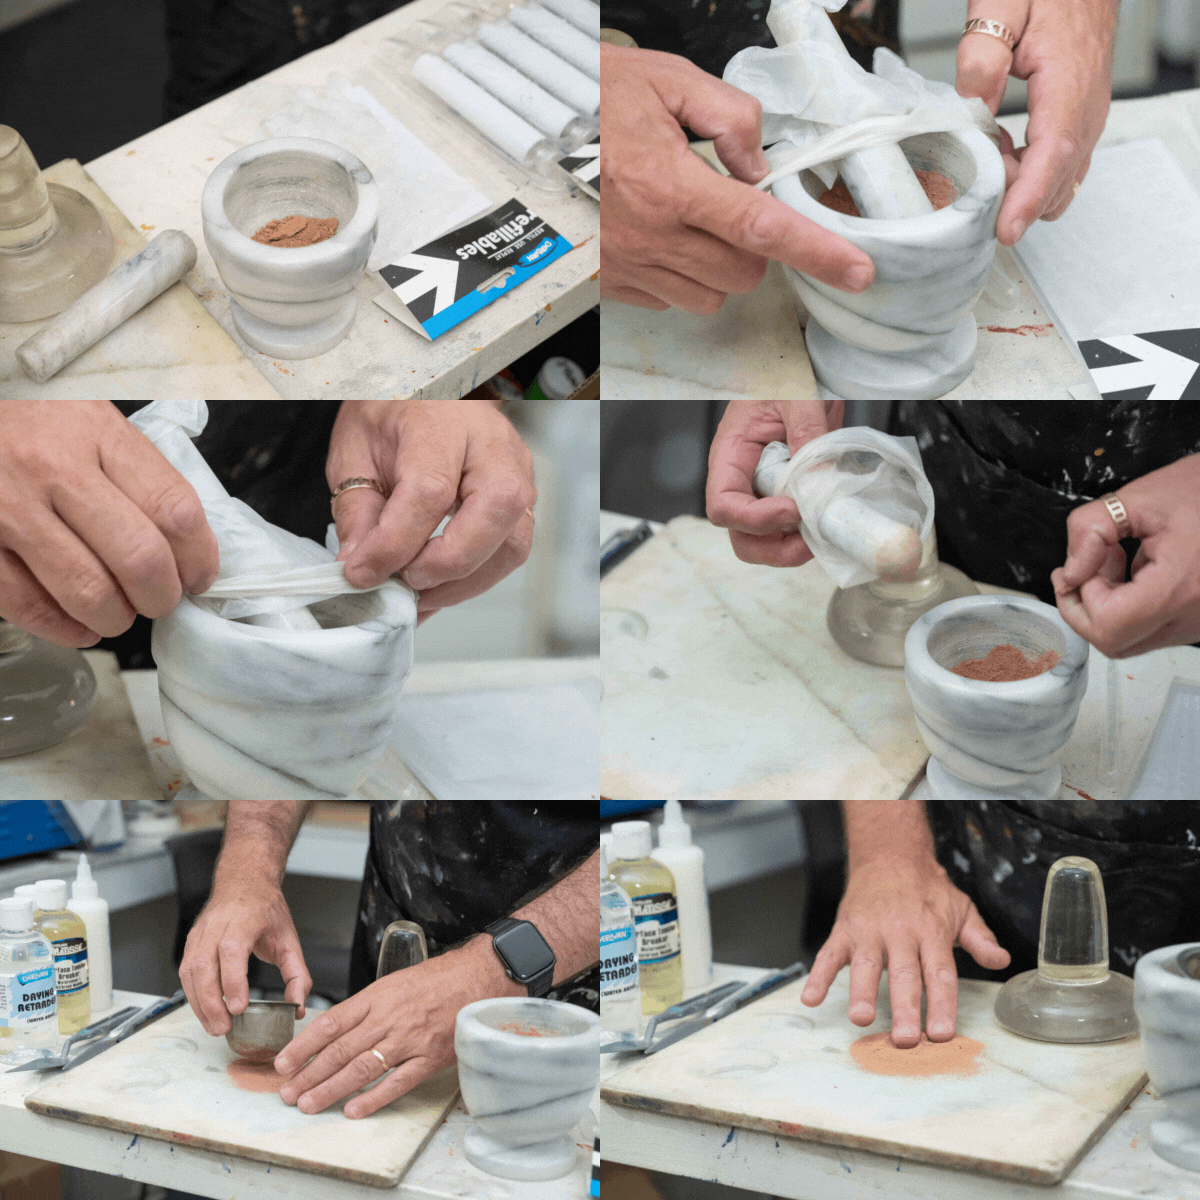
Step 1 You need to bring the pigment from rocks and shards down to a fine powder that feels similar to talcum powder. In these photos we use a surgical glove over the mortar and pestle to avoid creating clouds of dust, if you are breaking up found rocks then you probably don't know exactly what is in them - treat all dust as bad! DO NOT breathe it in - you can use a stocking or even plastic bag to reduce the dust. Once you have your pigment fine enough it is worth sifting it through a sieve or corse cloth to take out any larger pieces.
At this point it is a good idea to "wash" your pigment - literally mix it in a large container of water, allow to settle for a day or 2 then pour off the water leaving the sediment behind, you would generally repeat this until the water is clear when the pigment settles out, this might be several washes - this removes all water soluble impurities - you then need to let the sediment dry out - and give it a good grind again - and your pigment preparation is done
STEP TWO - HOW MUCH PIGMENT TO VEHICLE?
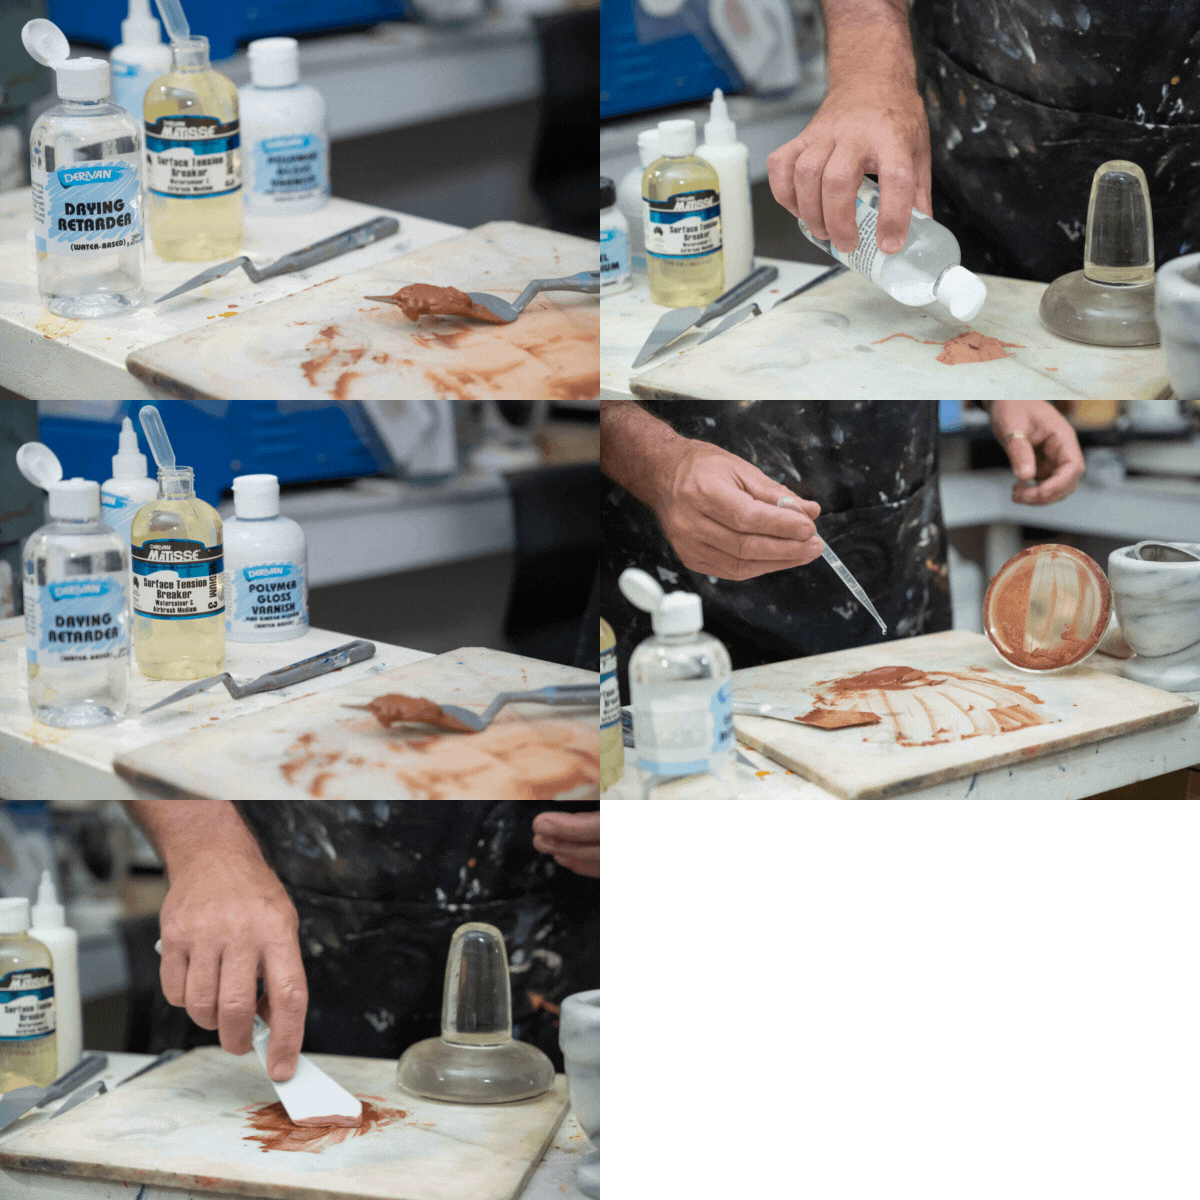
Usually start with around equal weights - however, this can vary massively depending on the pigment. So it is a matter of adding the your vehicle little by little as you go..... “to taste” - The best slurries are developed by adding the least amount of vehicle whilst always trying to keep the slurry moving - in a thick paste-like form - Start first with a pallet or painting knife folding the slurry over and over until there is a uniform mix as you add the vehicle. Then move to your paint muller - or you can use a mortar and pestle to do this however a paint muller is beneficial as one is able to hear as well as feel the grind getting finer and finer as you work. This paste needs to be ground so that absolutely no grittiness can be felt when it is rubbed between thumb and forefinger (better still, find a Hegman gauge and check out the “micron spread”.
Once you have your slurry well ground and uniform it is time to add the binder.
When referring to vehicle above this is generally a mix of: 50 parts drying retarder, and 50 parts water, some artists prefer to use straight drying retarder, however 100% water is generally not advisable as many pigments will repel 100% water. At this point you may wish to add 3-5parts Surface tension breaker, which is a dispersant and will help to chemically break the pigment particles apart
PAINT MAKING STEP THREE
ADDING THE ACRYLIC
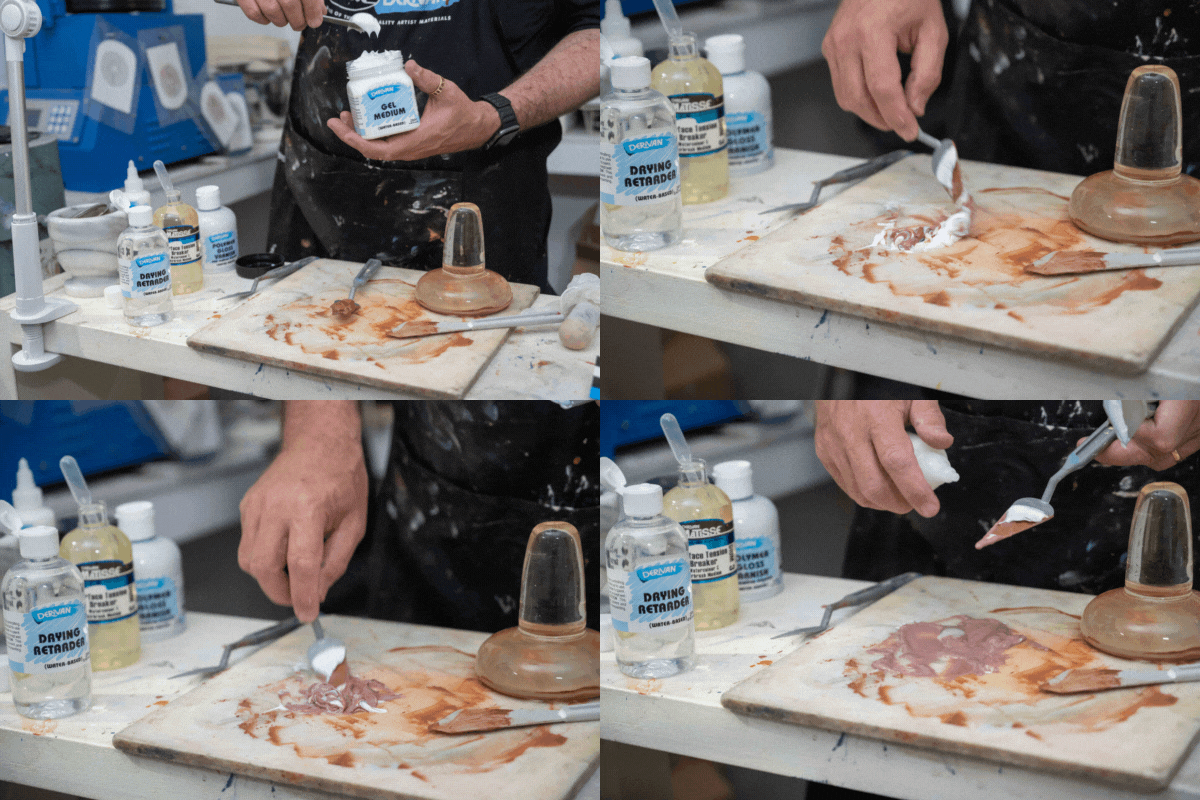
Once the slurry is even and has no "lumps or grit, " add the acrylic (Derivan Gel Medium for thick buttery formula, or Derivan Polymer Gloss Varnish for a more flowable formula.)
It is best to mix the pigment slurry that you have made into the acrylic medium you have choosen taking your time not to add bubbles, fold the two parts together until they form one homogeneous mix. If you are mixing larger amounts or are in a hurry! you can use Derivan Anti-foam to remove the air bubbles that will most likely build up. Antifoam requires less than 1% in the formula.
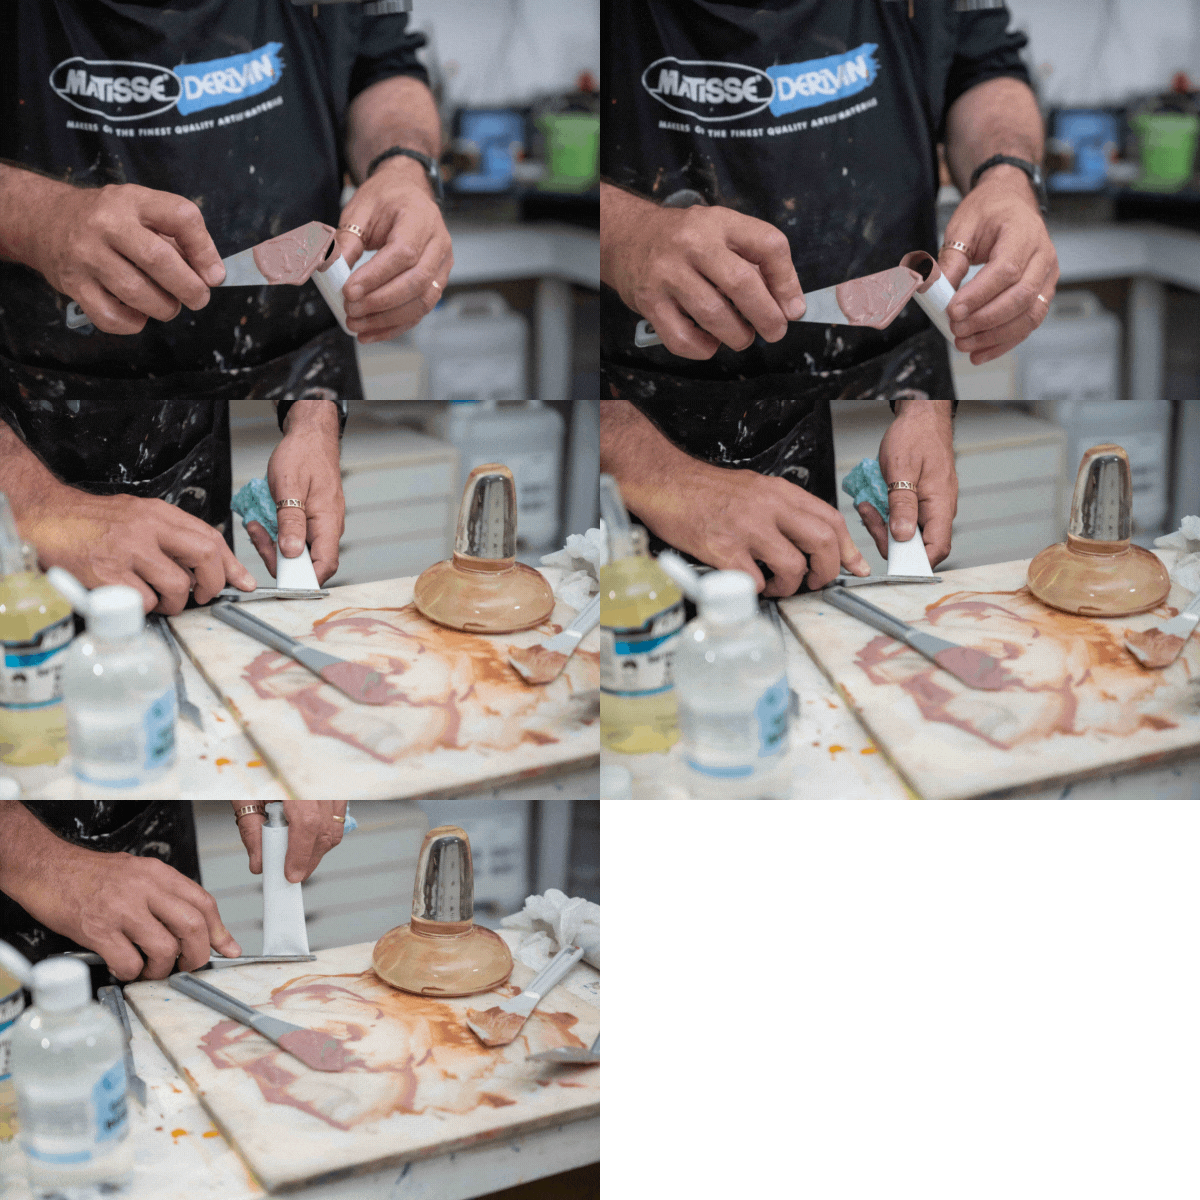
PAINT MAKING STEP FOUR
TUBE UP YOUR PAINT
Derivan Paint Tube Set
Derivan Refillable Empty Paint Tubes are perfect for when you are working on a painting and want to save your mixed paint colours for the next time! And perfect for your custom made paint
- Aluminum-lined empty paint tubes
- It comes with flip-top caps
- Perfect for Plein air or regular studio mixes
- 5 x 40ml Tubes