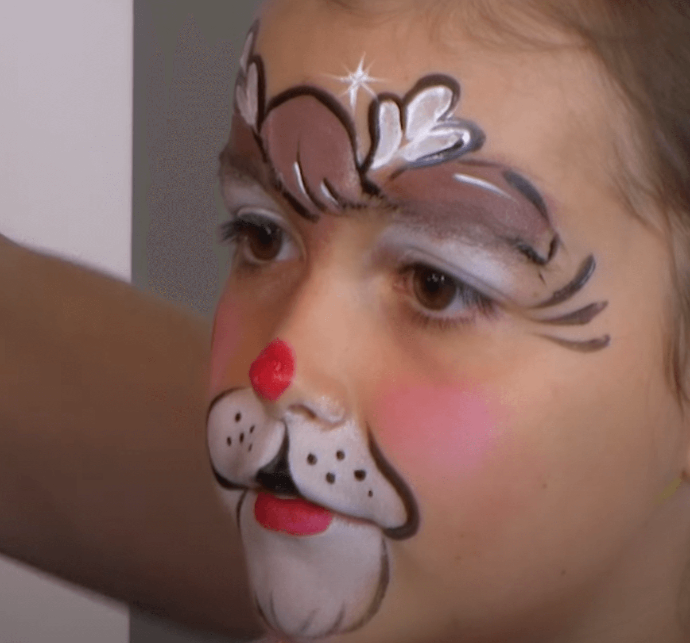
RUDOLPH FACE PAINT DESIGN
This Rudolph face paint can make a complex costume easy by providing a face paint design that anyone can achieve with a bit of practice This look is perfect for Holiday festivities, Halloween or any costume event. The Christmas season is a time of giving and appreciation for friends and family, and we think creating art with loved ones can be a great way to do this. That's why we have created this guide to help walk you through this complex-looking design with ease and while spending time with loved ones and having fun.
YOU WILL NEED
Before starting your butterfly face paint design, ensure you have all the necessary supplies.
A clean, well-lit workspace
A mirror for easy visibility
Smock or apron to protect your clothes
Disposable gloves for cleanliness
You're ready to begin when you’re sure you have all the necessary tools!
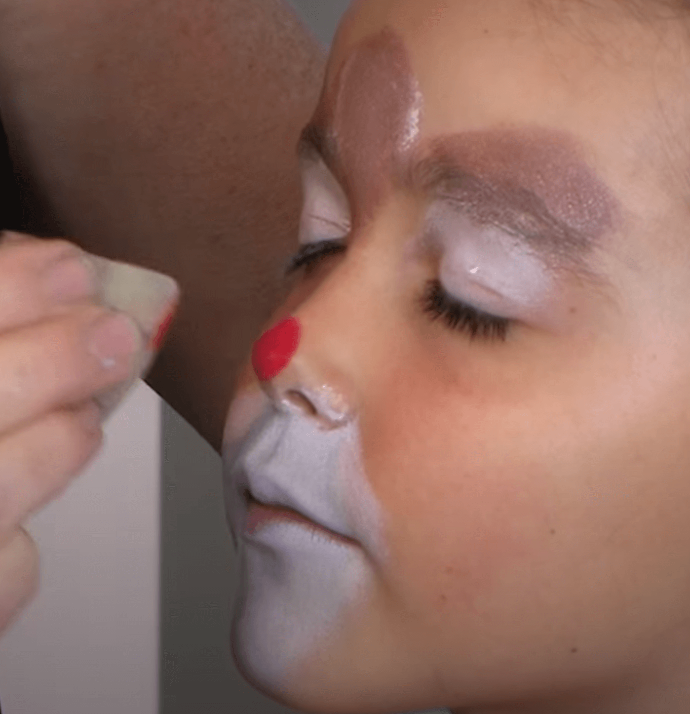
STEP ONE | SPONGING ON COLOURS
Using a sponge loaded with white paint, dab it on the eyelids and mouth area to create a base for the face paint.
Use this sponge to apply brown paint above and between the eyebrows to create the head shape.
Then, the red paint on a sponge, a red dot on the nose.
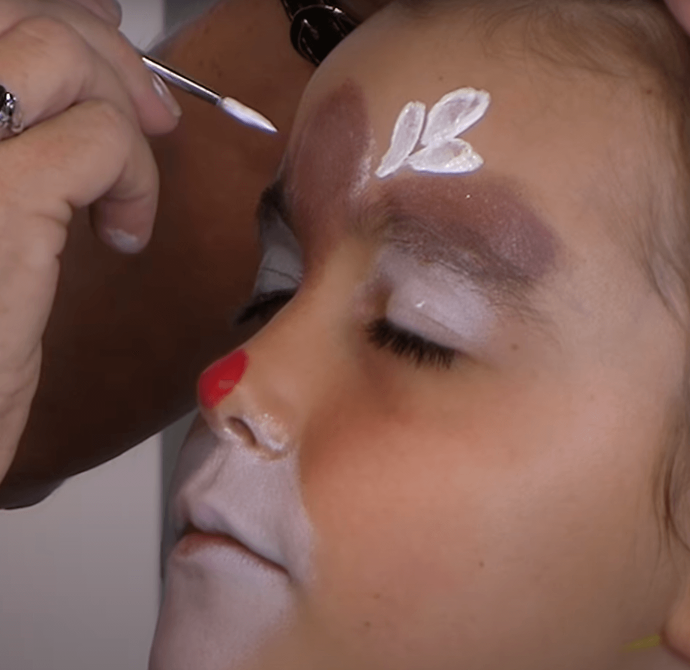
STEP TWO | REINDEER ANTLERS
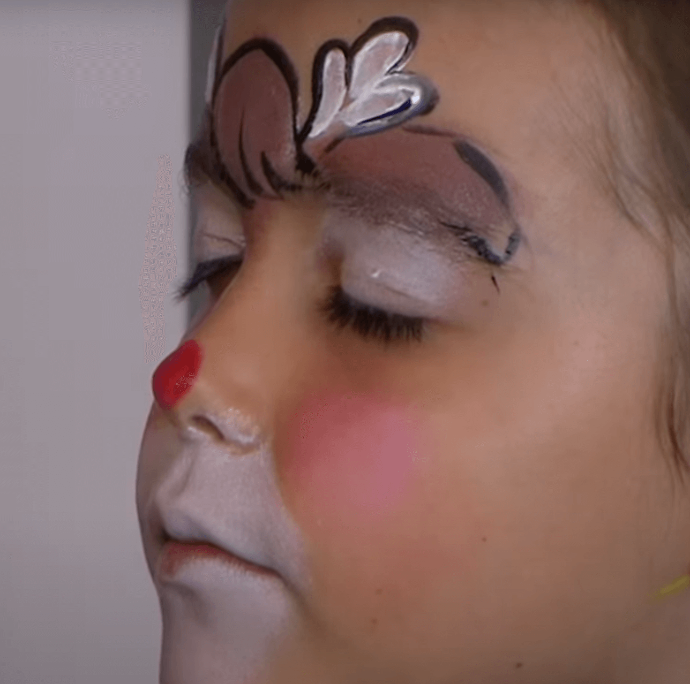
Using a round brush and white paint, create small petal-like shapes in the dips between the sponged-on brown details, creating antlers for the reindeer. To do this, gently press the against the skin and remove it.
STEP THREE | ANTLERS AND EARS
Using the sponge, dipped in a little white and a little red paint, dab a circle on each cheek to create a nice pink blush for the cheeks.
Then, using a round brush loaded with black paint, outline the brown shapes applied with the sponge earlier and the white antlers. Then, use long strokes between the eyebrows to create a fur design.
STEP FOUR | EYELASHES
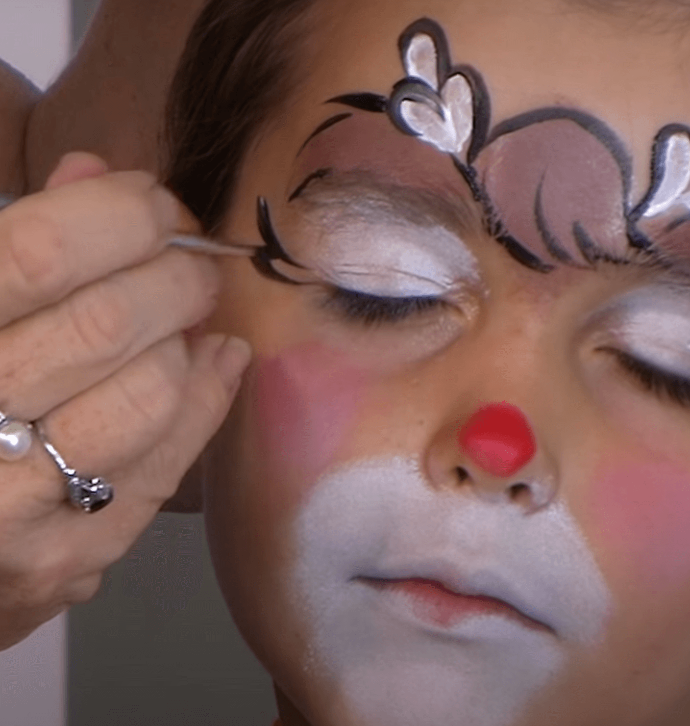
Using the round brush loaded with black paint, create short strokes inwards towards the outer corner of the eye from the edge of the face, creating eyelashes for the reindeer.
STEP FIVE | MOUTH AND NOSE
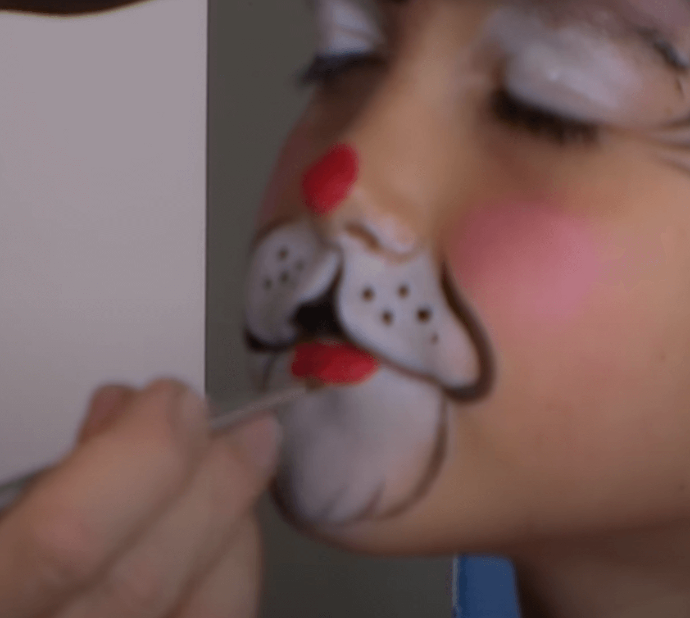
Using the rounded brush and black paint, outline the white area around the mouth, starting at the corners of the mouth and creating curved strokes upward. Then, using short, light strokes, create a fur pattern on the chin and connect this with a stroke that outlines the white area on the chin.
Use the black paint to fill in the upper lip, continue a line upward towards the nose, and then dot black spots on the white area on either side of this line.
Following this, fill in the bottom lip with red paint.
STEP SIX | FINISHING TOUCHES
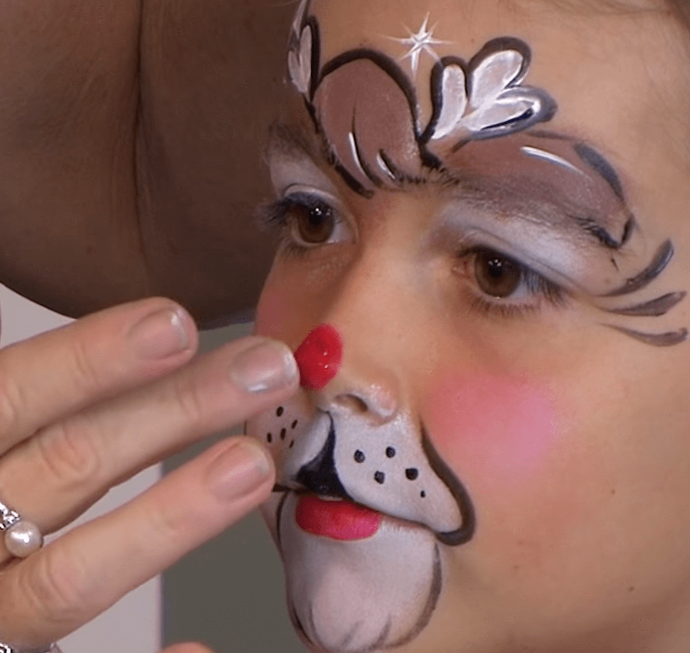
Using the round brush loaded with white paint, add some depth to the design by creating white highlights on the ears, above and between the eyebrows.
Using this same brush and paint, you can add a small star on the forehead as a cute detail for the design.
To finish the design, use the Derivan red Kindy Glitz glitter to add a sparkle to Rudolph's nose.
Tips to make your next Rudolph face paint design even better
There are plenty of ways to improve your next Rudolph face paint design. For example, if you’re creating a Rudolph design for a child, you should make the eyelashes and rosy cheeks more oversized to make them appear cuter.
Practice your Rudolph designs
As you can see, creating a Rudolph face paint design isn’t difficult, but it does take some practice. If you follow the tips and steps outlined in this guide, you’ll be a pro in no time. With a bit of practice, you’ll be able to easily create cute Rudolph face paint designs.
