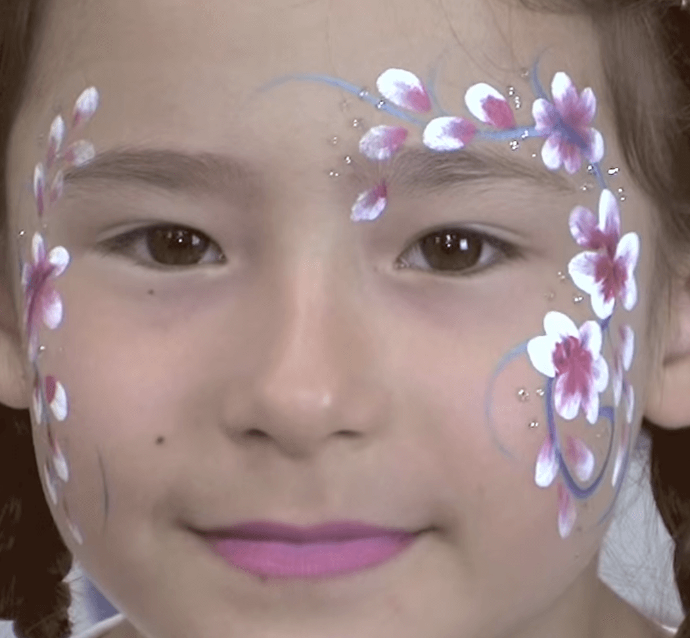
CHERRY BLOSSOM FACE PAINT DESIGN
This beautiful cherry blossom design is a gorgeous look for everyone, and can be used for a range of events including halloween, dress up parties, festivals and so much more. This guide will help you create a complex looking design with ease, and with only a little bit of practice, you'll be a professional and creating incredible cherry blossom designs in no time.
YOU WILL NEED
Before starting your cherry blossom face paint design, ensure you have all the necessary supplies.
A clean, well-lit workspace
A disposable surface to protect your workspace
A mirror for easy visibility
Smock or apron to protect your clothes
Disposable gloves for cleanliness
OR
You're ready to begin when you’re sure you have all the necessary tools!
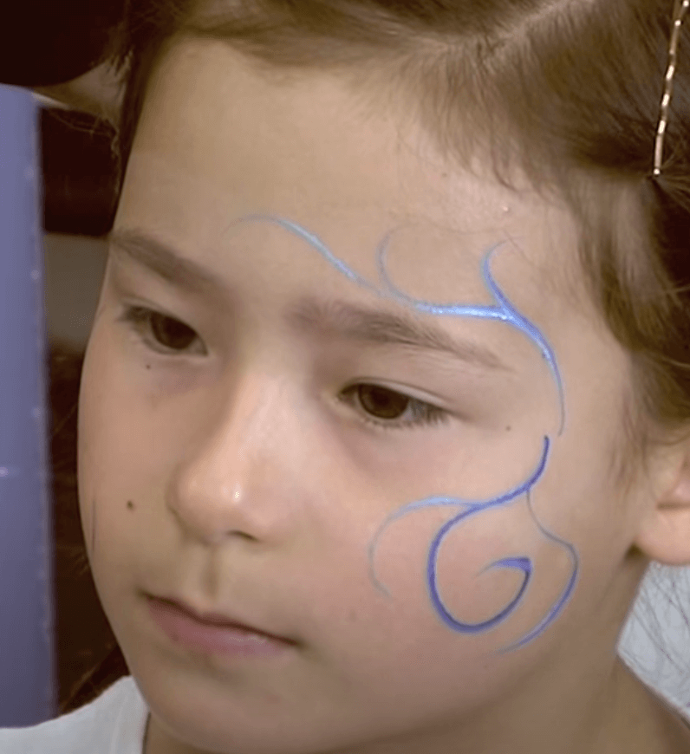
STEP ONE | FLOWER STEM
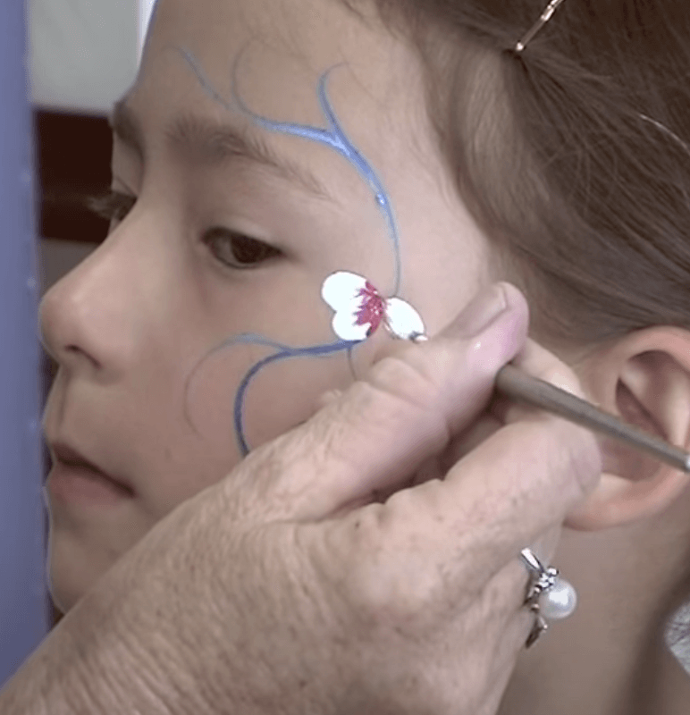
Using a script liner loaded with blue paint, create long swirling strokes around the edges of the face, cheeks and forehead.
To create an extra detail, you may dip the tip of the script liner is white paint, very lightly, to create a gradient between colours.
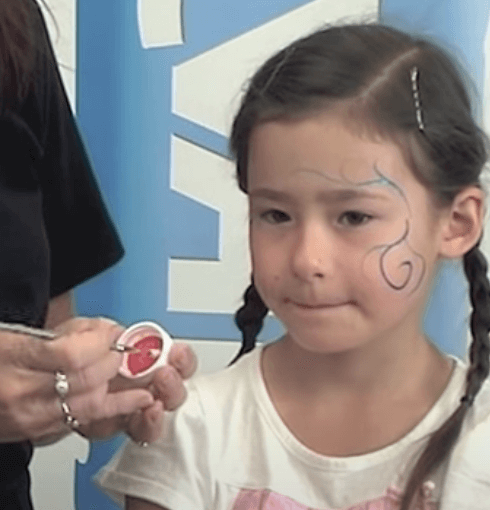
STEP TWO | PREPARE THE BRUSH
Double load a round brush by first loading it with white paint, then dipping the tip in red paint. Make sure not to mix the colours too much, just dip the brush in the red paint.
STEP THREE | PETAL TECHNIQUE
To create the petals, use the loaded brush and lightly place it, red tip first, onto the face. Once the red tip has made contact, move the brush to a more horizontal position with the face, to create contact between the face and the white paint. Then, lift the brush without dragging it ovcreating a stroke. This will create a beautiful petal because of the double loading of the brush.
STEP FOUR | FLOWERS
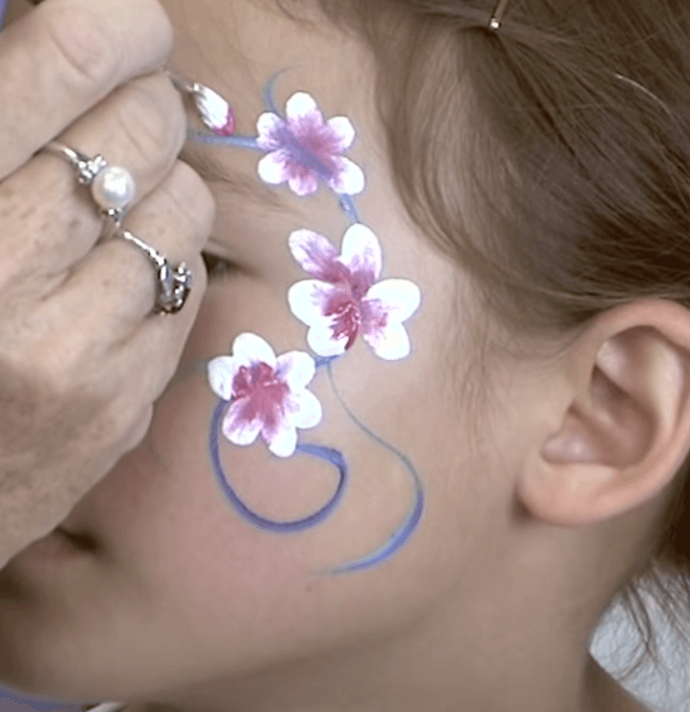
To create a flower, creating multiple petals in circular share, ensuring the red tip of the brush remains at the centre. This will create beautiful flower designs, and this can be repeated multiple times along the stem that was created before.
STEP FIVE | PETALS
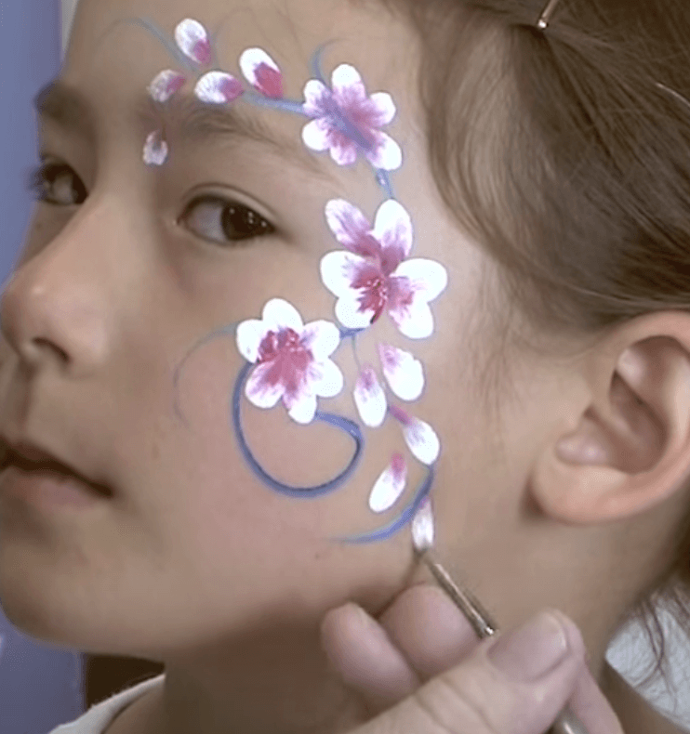
On smaller stems and thinner parts of the base line, towards the edges of the design, individual petals can be added to create a more interesting and colourful design. Ensure the red tip of these petals remains towards the centre of the design.
STEP SIX | LIPS
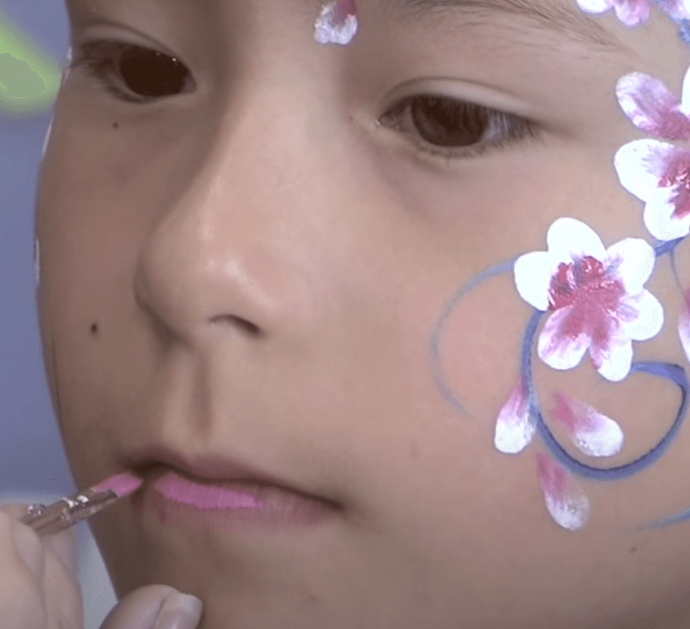
To create a more finished design, mix white and red paint to make a lovely pink colour, and use a chisel brush to apply this to the lips.
STEP SEVEN | FINAL TOUCHES
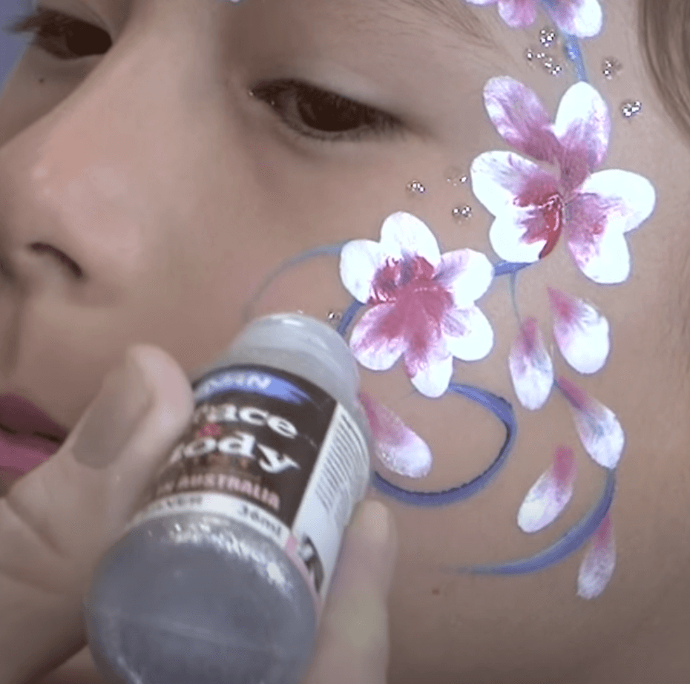
Using Derivan Face and Body Kindy Glitz, create small groups of three or four dots throughout the design, specifically in empty areas and around the eyes. This will create a beautiful detail that finishes the design perfectly. The design in the video uses silver Kindy Glitz, though the Fairy Princess starter pack includes purple and aqua kindy glitz that you can use instead.
Tips to make your next cherry blossom face paint design even better
There are plenty of ways to improve your next cherry blossom face paint design. For example, creating flowers with different colours or petals that include more than two colours, such as white, orange and red.
Practice your cherry blossom designs
As you can see, creating a cherry blossom face paint design isn’t difficult, but it does take some practice. If you follow the tips and steps outlined in this guide, you’ll be a pro in no time. With a bit of practice, you’ll be able to easily create beautiful cherry blossom face paint designs.
